2020. április 13., hétfő

RapidScan: The Multi-Tool Website Vulnerabilities Scanner With Artificial Intelligence

RapidScan's Features:
  • One-step installation.
  • Executes a multitude of security scanning tools, does other custom coded checks and prints the results spontaneously.
  • Come of the tools include nmap, dnsrecon, wafw00f, uniscan, sslyze, fierce, lbd, theharvester, dnswalk, golismero etc executes under one entity.
  • Saves a lot of time, indeed a lot time!
  • Checks for same vulnerabilities with multiple tools to help you zero-in on false positives effectively.
  • Legends to help you understand which tests may take longer time, so you can Ctrl+C to skip if needed.
  • Association with OWASP Top 10 2017 on the list of vulnerabilities discovered. (under development)
  • Critical, high, large, low and informational classification of vulnerabilities.
  • Vulnerability definitions guides you what the vulnerability actually is and the threat it can pose
  • Remediations tells you how to plug/fix the found vulnerability.
  • Executive summary gives you an overall context of the scan performed with critical, high, low and informational issues discovered. (under development)
  • Artificial intelligence to deploy tools automatically depending upon the issues found. for eg; automates the launch of wpscan and plecost tools when a wordpress installation is found. (under development)
  • Detailed comprehensive report in a portable document format (*.pdf) with complete details of the scans and tools used. (under development)

For Your Infomation about RapidScan:
  • Program is still under development, works and currently supports 80 vulnerability tests.
  • Parallel processing is not yet implemented, may be coded as more tests gets introduced.

RapidScan supports checking for these vulnerabilities:
  • DNS/HTTP Load Balancers & Web Application Firewalls. 
  • Checks for Joomla, WordPress and Drupal
  • SSL related Vulnerabilities (HEARTBLEED, FREAK, POODLE, CCS Injection, LOGJAM, OCSP Stapling).
  • Commonly Opened Ports.
  • DNS Zone Transfers using multiple tools (Fierce, DNSWalk, DNSRecon, DNSEnum).
  • Sub-Domains Brute Forcing.
  • Open Directory/File Brute Forcing.
  • Shallow XSS, SQLi and BSQLi Banners.
  • Slow-Loris DoS Attack, LFI (Local File Inclusion), RFI (Remote File Inclusion) & RCE (Remote Code Execution).

RapidScan's Requirements:
  • Kali Linux, Parrot Security OS, BlackArch... Linux distros that based for pentesters and hackers.
  • Python 2.7.x

RapidScan Installation:


RapidScan's screenshots:
RapidScan helping menu
RapidScan Intro
RapidScan Outro

How to contribute?
If you want to contribute to the author. Read this.

Related links


  1. Hack Tools Mac
  2. Black Hat Hacker Tools
  3. Hacker Hardware Tools
  4. Hacker Search Tools
  5. Bluetooth Hacking Tools Kali
  6. Hacker Tools Apk
  7. Hacking Tools Hardware
  8. Hack Tools Github
  9. How To Install Pentest Tools In Ubuntu
  10. Pentest Tools Review
  11. Pentest Tools Find Subdomains
  12. Hack Tools For Windows
  13. Hack Tool Apk
  14. World No 1 Hacker Software
  15. Blackhat Hacker Tools
  16. Android Hack Tools Github
  17. Pentest Reporting Tools
  18. Pentest Tools Alternative
  19. Tools For Hacker
  20. Hacker Tools Hardware
  21. Growth Hacker Tools

Bypass Hardware Firewalls

This is just a collection of links about my DEF CON 22 presentation, and the two tools I released:

Slides:
http://www.slideshare.net/bz98/defcon-22-bypass-firewalls-application-white-lists-secure-remote-desktops-in-20-seconds

Tools:
https://github.com/MRGEffitas/Write-into-screen
https://github.com/MRGEffitas/hwfwbypass

Presentation video from Hacktivity:
https://www.youtube.com/watch?v=KPJBckmhtZ8

Technical blog post:
https://blog.mrg-effitas.com/bypass-hardware-firewalls-def-con-22/

Have fun!


More information
  1. Pentest Tools For Ubuntu
  2. Hacking Tools For Pc
  3. Pentest Tools Free
  4. Free Pentest Tools For Windows
  5. Pentest Tools Subdomain
  6. Hack Tools Github
  7. Android Hack Tools Github
  8. Pentest Tools For Ubuntu
  9. Pentest Tools Alternative
  10. Top Pentest Tools
  11. Hacker Tools 2019
  12. Hacker Tools Hardware
  13. Best Pentesting Tools 2018
  14. Pentest Tools Apk
  15. Pentest Tools Bluekeep
  16. Pentest Tools For Mac
  17. Game Hacking
  18. Hacker Tools Hardware
  19. Free Pentest Tools For Windows
  20. Hack Tools For Ubuntu
  21. Hack Tools For Games
  22. Hack Tools For Ubuntu

Airba.sh - A POSIX-compliant, Fully Automated WPA PSK Handshake Capture Script Aimed At Penetration Testing


Airbash is a POSIX-compliant, fully automated WPA PSK handshake capture script aimed at penetration testing. It is compatible with Bash and Android Shell (tested on Kali Linux and Cyanogenmod 10.2) and uses aircrack-ng to scan for clients that are currently connected to access points (AP). Those clients are then deauthenticated in order to capture the handshake when attempting to reconnect to the AP. Verification of a captured handshake is done using aircrack-ng. If one or more handshakes are captured, they are entered into an SQLite3 database, along with the time of capture and current GPS data (if properly configured).
After capture, the database can be tested for vulnerable router models using crackdefault.sh. It will search for entries that match the implemented modules, which currently include algorithms to compute default keys for Speedport 500-700 series, Thomson/SpeedTouch and UPC 7 digits (UPC1234567) routers.

Requirements
WiFi interface in monitor mode aircrack-ng SQLite3 openssl for compilation of modules (optional) wlanhc2hcx from hcxtools
In order to log GPS coordinates of handshakes, configure your coordinate logging software to log to .loc/*.txt (the filename can be chosen as desired). Airbash will always use the output of cat "$path$loc"*.txt 2>/dev/null | awk 'NR==0; END{print}', which equals to reading all .txt files in .loc/ and picking the second line. The reason for this way of implementation is the functionality of GPSLogger, which was used on the development device.

Calculating default keys
After capturing a new handshake, the database can be queried for vulnerable router models. If a module applies, the default keys for this router series are calculated and used as input for aircrack-ng to try and recover the passphrase.

Compiling Modules
The modules for calculating Thomson/SpeedTouch and UPC1234567 (7 random digits) default keys are included in src/
Credits for the code go to the authors Kevin Devine and [peter@haxx.in].
On Linux:
gcc -fomit-frame-pointer -O3 -funroll-all-loops -o modules/st modules/stkeys.c -lcrypto
gcc -O2 -o modules/upckeys modules/upc_keys.c -lcrypto
If on Android, you may need to copy the binaries to /system/xbin/ or to another directory where binary execution is allowed.

Usage
Running install.sh will create the database, prepare the folder structure and create shortlinks to both scripts which can be moved to a directory that is on $PATH to allow execution from any location.
After installation, you may need to manually adjust INTERFACE on line 46 in airba.sh. This will later be determined automatically, but for now the default is set to wlan0, to allow out of the box compatibility with bcmon on Android.
./airba.sh starts the script, automatically scanning and attacking targets that are not found in the database. ./crackdefault.sh attempts to break known default key algorithms.
To view the database contents, run sqlite3 .db.sqlite3 "SELECT * FROM hs" in the main directory.

Update (Linux only ... for now):
Airbash can be updated by executing update.sh. This will clone the master branch into /tmp/ and overwrite the local files.

Output
_n: number of access points found
__c/m: represents client number and maximum number of clients found, respectively
-: access point is blacklisted
x: access point already in database
?: access point out of range (not visible to airodump anymore)

The Database
The database contains a table called hs with seven columns.
id: incrementing counter of table entries
lat and lon: GPS coordinates of the handshake (if available)
bssid: MAC address of the access point
essid: Name identifier
psk: WPA Passphrase, if known
prcsd: Flag that gets set by crackdefault.sh to prevent duplicate calculation of default keys if a custom passphrase was used.
Currently, the SQLite3 database is not password-protected.


Related posts


Fragroute


"fragroute intercepts, modifies, and rewrites egress traffic destined for a specified host, implementing most of the attacks described in the Secure Networks "Insertion, Evasion, and Denial of Service: Eluding Network Intrusion Detection" paper of January 1998. It features a simple ruleset language to delay, duplicate, drop, fragment, overlap, print, reorder, segment, source-route, or otherwise monkey with all outbound packets destined for a target host, with minimal support for randomized or probabilistic behaviour. This tool was written in good faith to aid in the testing of network intrusion detection systems, firewalls, and basic TCP/IP stack behaviour." read more...

Website: http://monkey.org/~dugsong/fragroute

Related articles

Medusa: A Speedy, Parallel And Modular Login Brute-forcing Tool


About Medusa
   Medusa is a speedy, parallel, and modular, login brute-forcer. The goal is to support as many services which allow remote authentication as possible. The author considers following items as some of the key features of this application:

   Thread-based parallel testing. Brute-force testing can be performed against multiple hosts, users or passwords concurrently.

   Flexible user input. Target information (host/user/password) can be specified in a variety of ways. For example, each item can be either a single entry or a file containing multiple entries. Additionally, a combination file format allows the user to refine their target listing.

   Modular design. Each service module exists as an independent .mod file. This means that no modifications are necessary to the core application in order to extend the supported list of services for brute-forcing.

   Multiple protocols supported. Many services are currently supported (e.g. SMB, HTTP, MS-SQL, POP3, RDP, SSHv2, among others).

   See doc/medusa.html for Medusa documentation. For additional information:

Building on macOS

#getting the source
git clone https://github.com/jmk-foofus/medusa
cd medusa

#macOS dependencies
brew install freerdp
$ export FREERDP2_CFLAGS='-I/usr/local/include'
$ export FREERDP2_LIBS='-I/usr/local/lib/freerdp'

#building
./configure
make

#executing

./src/medusa
Medusa's Installation
   Medusa is already installed on Kali Linux, Parrot Security OS, BlackArch and any other Linux distros based for security pentesting purposes.

   For Debian-based distro users, open your Terminal and enter this command:
sudo apt install medusa

   For Arch Linux-based distro users, enter this command: sudo pacman -S medusa

About the author:

You might like these similar tools:
Related word
  1. Hack Apps
  2. Hacker Tools
  3. Hacking Tools Free Download
  4. Hacking Tools For Windows Free Download
  5. Hacking Tools Windows
  6. Hacking Tools For Kali Linux
  7. Nsa Hack Tools Download
  8. Hack Tools
  9. Hacker Tools Free
  10. Hack Tools For Pc
  11. Hacking Tools Download
  12. Hacker Tools Apk
  13. Hacking Tools Windows
  14. Pentest Tools Bluekeep
  15. Hack Tool Apk No Root
  16. Pentest Tools Subdomain
  17. Beginner Hacker Tools
  18. Hacking Tools Usb
  19. Pentest Tools Website
  20. Pentest Tools Nmap
  21. Pentest Tools Download

2019-nCoV CORONAVIRUS CASE DATABASE

[OFF TOPIC]
This post is a very much unrelated to information security and malware.

However, it is still very much "Contagio" as it is a project for keeping stats for the coronavirus 2019-nCoV infections.

While there are a number of resources that post current daily stats, it is harder to find daily historical numbers going to the first known infection case that was recorded on December 1, 2019.

Feel free to export, download and use it for any purposes. If you decide to use it and want to let me know or have corrections, you can leave a comment or email (email address is in the profile).

LInk 1  2019-nCoV Coronavirus database 

Link 2  2019-nCoV Coronavirus database 

It works fine on mobile devices but the layout renders much better on a larger screen.

More articles


  1. Hacking Tools Online
  2. Hacking Tools 2020
  3. Hack Tools For Mac
  4. Hacker Tools Mac
  5. Hack App
  6. Kik Hack Tools
  7. Pentest Tools Url Fuzzer
  8. Tools Used For Hacking
  9. Hacking Tools For Beginners
  10. New Hack Tools
  11. Hacking Tools Github
  12. Pentest Tools Linux
  13. Hacker Tools Mac
  14. Hacking Tools Online
  15. Install Pentest Tools Ubuntu
  16. Hackrf Tools
  17. Termux Hacking Tools 2019
  18. Hacker Tools Apk Download
  19. Game Hacking
  20. Usb Pentest Tools
  21. Growth Hacker Tools
  22. Growth Hacker Tools
  23. Ethical Hacker Tools
  24. Hackrf Tools
  25. Hacker Tools Free

Sslmerge - Tool To Help You Build A Valid SSL Certificate Chain From The Root Certificate To The End-User Certificate


Is an open source tool to help you build a valid SSL certificate chain from the root certificate to the end-user certificate. Also can help you fix the incomplete certificate chain and download all missing CA certificates.

How To Use
It's simple:
# Clone this repository
git clone https://github.com/trimstray/sslmerge

# Go into the repository
cd sslmerge

# Install
./setup.sh install

# Run the app
sslmerge -i /data/certs -o /data/certs/chain.crt
  • symlink to bin/sslmerge is placed in /usr/local/bin
  • man page is placed in /usr/local/man/man8

Parameters
Provides the following options:
  Usage:
sslmerge <option|long-option>

Examples:
sslmerge --in Root.crt --in Intermediate1.crt --in Server.crt --out bundle_chain_certs.crt
sslmerge --in /tmp/certs --out bundle_chain_certs.crt --with-root
sslmerge -i Server.crt -o bundle_chain_certs.crt

Options:
--help show this message
--debug displays information on the screen (debug mode)
-i, --in add certificates to merge (certificate file, multiple files or directory with ssl certificates)
-o, --out saves the result (chain) to file
--with-root add root certificate to the certificate chain

How it works
Let's start with ssllabs certificate chain. They are delivered together with the sslmerge and can be found in the example/ssllabs.com directory which additionally contains the all directory (containing all the certificates needed to assemble the chain) and the server_certificate directory (containing only the server certificate).
The correct chain for the ssllabs.com domain (the result of the openssl command):
Certificate chain
0 s:/C=US/ST=California/L=Redwood City/O=Qualys, Inc./CN=ssllabs.com
i:/C=US/O=Entrust, Inc./OU=See www.entrust.net/legal-terms/OU=(c) 2012 Entrust, Inc. - for authorized use only/CN=Entrust Certification Authority - L1K
1 s:/C=US/O=Entrust, Inc./OU=See www.entrust.net/legal-terms/OU=(c) 2012 Entrust, Inc. - for authorized use only/CN=Entrust Certification Authority - L1K
i:/C=US/O=Entrust, Inc./OU=See www.entrust.net/legal-terms/OU=(c) 2009 Entrust, Inc. - for authorized use only/CN=Entrust Root Certification Authority - G2
2 s:/C=US/O=Entrust, Inc./OU=See www.entrust.net/legal-terms/OU=(c) 2009 Entrust, Inc. - for authorized use only/CN=Entrust Root Certification Authority - G2
i:/C=US/O=Entrust, Inc./OU=www.entrust.net/CPS is incorporated by reference/OU=(c) 2006 Entrust, Inc./CN=Entrust Root Certification Authority
The above code presents a full chain consisting of:
  • Identity Certificate (Server Certificate)
    issued for ssllabs.com by Entrust Certification Authority - L1K
  • Intermediate Certificate
    issued for Entrust Certification Authority - L1K by Entrust Root Certification Authority - G2
  • Intermediate Certificate
    issued for Entrust Root Certification Authority - G2 by Entrust Root Certification Authority
  • Root Certificate (Self-Signed Certificate)
    issued for Entrust Root Certification Authority by Entrust Root Certification Authority

Scenario 1
In this scenario, we will chain all delivered certificates. Example of running the tool:

Scenario 2
In this scenario, we only use the server certificate and use it to retrieve the remaining required certificates. Then, as above, we will combine all the provided certificates. Example of running the tool:

Certificate chain
In order to create a valid chain, you must provide the tool with all the necessary certificates. It will be:
  • Server Certificate
  • Intermediate CAs and Root CAs
This is very important because without it you will not be able to determine the beginning and end of the chain.
However, if you look inside the generated chain after generating with sslmerge, you will not find the root certificate there. Why?
Because self-signed root certificates need not/should not be included in web server configuration. They serve no purpose (clients will always ignore them) and they incur a slight performance (latency) penalty because they increase the size of the SSL handshake.
If you want to add a root certificate to the certificate chain, call the utility with the --with-root parameter.

Certification Paths
Sslmerge allows use of two certification paths:

Output comments
When generating the chain of certificates, sslmerge displays comments with information about certificates, including any errors.
Here is a list of all possibilities:

not found identity (end-user, server) certificate
The message is displayed in the absence of a server certificate that is the beginning of the chain. This is a unique case because in this situation the sslmerge ends its operation displaying only this information. The server certificate is the only certificate required to correctly create a chain. Without this certificate, the correct chain will not be created.

found correct identity (end-user, server) certificate
The reverse situation here - message displayed when a valid server certificate is found.

not found first intermediate certificate
This message appears when the first of the two intermediate certificates is not found. This information does not explicitly specify the absence of a second intermediate certificate and on the other hand it allows to determine whether the intermediate certificate to which the server certificate was signed exists. Additionally, it can be displayed if the second intermediate certificate has been delivered.

not found second intermediate certificate
Similar to the above, however, it concerns the second intermediate certificate. However, it is possible to create the chain correctly using the second certification path, e.g. using the first intermediate certificate and replacing the second with the main certificate.

one or more intermediate certificate not found
This message means that one or all of the required intermediate certificates are missing and displayed in the absence of the root certificate.

found 'n' correct intermediate certificate(s)
This message indicates the number of valid intermediate certificates.

not found correct root certificate
The lack of the root certificate is treated as a warning. Of course, when configuring certificates on the server side, it is not recommended to attach a root certificate, but if you create it with the sslmerge, it treats the chain as incomplete displaying information about the incorrect creation of the chain.

an empty CN field was found in one of the certificates
This message does not inform about the error and about the lack of the CN field what can happen with some certificates (look at example/google.com). Common Name field identifies the host name associated with the certificate. There is no requirement in RFC3280 for an Issuer DN to have a CN. Most CAs do include a CN in the Issuer DN, but some don't, such as this Equifax CA.

Requirements
Sslmerge uses external utilities to be installed before running:

Other

Contributing
See this.

Project architecture
See this.


Continue reading

Kali Linux VM Installation And Setup

Preface

From time to time I realize that certain tasks that are trivial for me are not necessarily easy for others, especially if they are just getting started with IT security stuff.

As I am going to be a Facilitator at SANS Munich 2015 on SEC 401, plus we have a few people at work who are just dipping their toe into the wonderful world of Kali Linux, it seemed like a good opportunity to make a short getting started / installation guide on the Kali VMWare VMs that you can download and quickly get started.

On top of that, when I check the statistics of the blog, I always see that the most popular posts are the detailed howtos and tutorials and I assume that it is because there is a need for this kind of posts too, so here it goes! :)


Step -1: Check in your BIOS/UEFI if virtualization is enabled

We are going to use virtualization, so it would be nice to enable it, right?

In BIOS/UEFI menus this is somewhere around "Security" and/or "Virtualization" and it is something like "Intel (R) Virtualization Technology" and "Intel (R) VT-d Feature" that needs to be set to "Enabled".


Step 0: Install VMWare Player or VMWare Workstation

The Kali Linux VMs are VMWare-based, so you need to install VMWare Player (free), VMWare Workstation (paid) or VMWare Fusion (paid, for OS-X).

The more desirable choice is to use VMWare Workstation or VMWare Fusion, as they have a Snapshot feature, while with VMWare Player, you are forced to take a full copy in order to have a sort of rollback feature.


Step 1: Download Kali VM

We need to download the Kali VMs from the "Custom Kali Images" download site, where you can find a 64 bit (amd64) and a 32 bit PAE (i686) too.

There are also Torrent files for the images and based on experience, using Torrent is much more faster and reliable than the HTTP download, so if you can, use that!

Once you have downloaded the VMs, do not forget to check their SHA1 hash!!! On Linux, you can simply use the sha1sum command at a terminal. For Windows, you can use something like the MD5 & SHA Checksum Utility.


Step 2: Change Kali VM default root password

The Kali VM comes with a preset root password, which is "toor" (without the quotes), therefore, it has to be changed.

Here is how you do it:
root@kali:~# passwd
Enter new UNIX password:
Retype new UNIX password:
passwd: password updated successfully


Step 3: Change Kali VM default SSH keys

The Kali VM also comes with SSH preinstalled, so we need to change the SSH keys to avoid SSH MiTM attacks.
Here is how you do it:
root@kali:~# cd /etc/ssh/
root@kali:/etc/ssh# mkdir default_kali_keys
root@kali:/etc/ssh# mv ssh_host_* default_kali_keys/
root@kali:/etc/ssh# dpkg-reconfigure openssh-server
Creating SSH2 RSA key; this may take some time ...
Creating SSH2 DSA key; this may take some time ...
Creating SSH2 ECDSA key; this may take some time ...
insserv: warning: current start runlevel(s) (empty) of script `ssh' overrides LSB defaults (2 3 4 5).
insserv: warning: current stop runlevel(s) (2 3 4 5) of script `ssh' overrides LSB defaults (empty).

Now we can check if the keys are really changed:

root@kali:/etc/ssh# md5sum /etc/ssh/*key*
md5sum: /etc/ssh/default_kali_keys: Is a directory
6abe210732068fa7ca95854c3078dba5 /etc/ssh/ssh_host_dsa_key
1b5f3c1a1b5c48cc3cce31b116e8b6f8 /etc/ssh/ssh_host_dsa_key.pub
8f0f60855e5ab8cac8103d64faab090f /etc/ssh/ssh_host_ecdsa_key
aace49ae9236815c9a1672f8ecb2b1e2 /etc/ssh/ssh_host_ecdsa_key.pub
cf861a9f743fb4584ab246024465ddf1 /etc/ssh/ssh_host_rsa_key
d5d65d8ad023a6cb1418ae05007bc6d3 /etc/ssh/ssh_host_rsa_key.pub
root@kali:/etc/ssh# md5sum /etc/ssh/default_kali_keys/*key*
c8d5b82320a4ddde59d0e2b6d9aad42a /etc/ssh/default_kali_keys/ssh_host_dsa_key
6b12ddecd463677cde8097e23d0f219a /etc/ssh/default_kali_keys/ssh_host_dsa_key.pub
fecf056571a3dfbf3635fc2c50bf23c5 /etc/ssh/default_kali_keys/ssh_host_ecdsa_key
e44b7c50635de42e89b3297414f5047d /etc/ssh/default_kali_keys/ssh_host_ecdsa_key.pub
e9e0267484e020878e00a9360b77d845 /etc/ssh/default_kali_keys/ssh_host_rsa_key
ceee93d7bbc9f9b9706e18f23d4e81f1 /etc/ssh/default_kali_keys/ssh_host_rsa_key.pub

Step 4: Update Kali VM

Next you need to update your Kali VM so that everything is patched.

Here is how you do it:

root@kali:~# apt-get update
Get 1 http://http.kali.org kali Release.gpg [836 B]
Get:2 http://security.kali.org kali/updates Release.gpg [836 B]
********************************* SNIP *********************************
Fetched 16.7 MB in 14s (1,190 kB/s)
Reading package lists... Done
root@kali:~# apt-get upgrade
eading package lists... Done
Building dependency tree
Reading state information... Done
The following packages have been kept back:
********************************* SNIP *********************************
The following packages will be upgraded:
********************************* SNIP *********************************
241 upgraded, 0 newly installed, 0 to remove and 16 not upgraded.
Need to get 740 MB of archives.
After this operation, 130 MB disk space will be freed.
Do you want to continue [Y/n]? Y
Get:1 http://security.kali.org/kali-security/ kali/updates/main libc6-i386 amd64 2.13-38+deb7u7 [4,044 kB]
Get:2 http://http.kali.org/kali/ kali/main base-files amd64 1:1.1.0 [77.5 kB]
********************************* SNIP *********************************
root@kali:~#


Step 5: Create a Snapshot/Copy the VM

Once you are done with all the above, you can make a Snapshot in case of VMWare Workstation or copy the files of the VM in case of VMWare Player, so that you can roll back to this clean stat in case you misconfigure something.

Hope this was helpful. Happy hacking!


Related links

2020. április 11., szombat

Tech Book Face Off: Getting Clojure Vs. Learn Functional Programming With Elixir

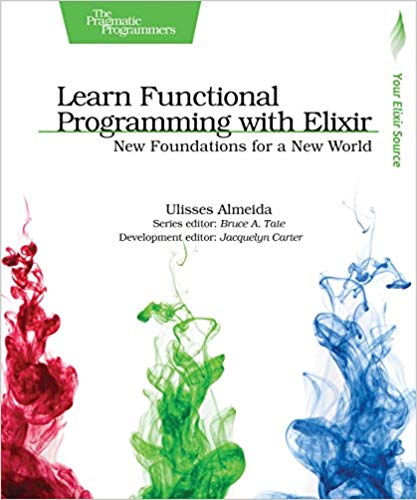
Ever since I read Seven Languages in Seven Weeks and Seven More Languages in Seven Weeks, I've been wanting to dig into some of the languages covered by those books a bit more, and so I've selected a couple of books on two interesting functional languages: Clojure and Elixir. For Clojure I narrowed the options down to Getting Clojure by Russ Olsen, and for Elixir I went with Learn Functional Programming with Elixir by Ulisses Almeida. You may notice that, like the Seven in Seven books, both of these books are from The Pragmatic Programmers. They seem to pretty consistently publish solid, engaging programming books, and I was hoping to have more good luck with these two books. We'll see how they turned out.
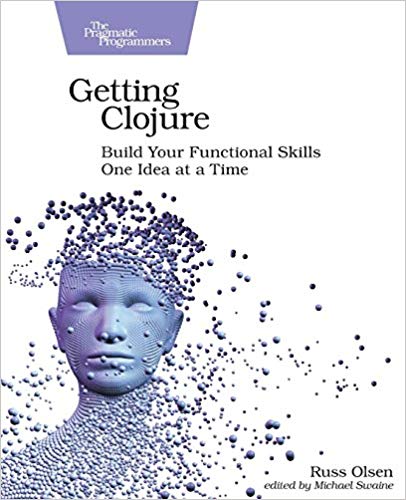
Getting Clojure front coverVS.Learn Functional Programming With Elixir front cover

Getting Clojure

I remember thoroughly enjoying Russ Olsen's Eloquent Ruby years ago, so my expectations were already set for this book. Olsen did not disappoint. While Getting Clojure is an introductory programming language book instead of a guide on the idioms and best practices of the language, like Eloquent Ruby was, he brings the same clear, concise writing, and nails the right balance between covering the minutia and sketching an overall picture of Clojure without boring the reader to tears.

Programming books that aim to teach a language from front to back can easily fall into the trap of spending too much time on all of the gory details about the language's arithmetic and logic systems or every possible control structure. Maybe it's because Clojure is a simple and straightforward language that doesn't have the complications that other languages have in these areas, but this book was a very easy read through these normally tedious parts. Olsen assumes the reader is already a programmer with a couple languages under their belt, so he lays out the mundane facts in a succinct, orderly manner and moves on to the more interesting bits.

Chapters are short and evenly spaced, each focusing on one small part of Clojure, starting off with the basics of arithmetic, variables, data types, logic, functions, and namespaces. Each chapter has sections at the end for discussing how to stay out of trouble when using those language features and what those features look like in actual Clojure programs. After the basics he covers the more intermediate topics of sequences, destructuring, records, tests, and specs before finishing things up with inter-operating with Java, working with threads, promises, futures, and state, and exploring the power of macros. It's a logical order that flows nicely, with later chapters building on earlier material through a gentle learning curve. I never felt stuck or frustrated, and I could read through a few chapters in a sitting at a rapid pace. That's testament to excellent technical writing skills that allow an experienced reader to go through the book at speed.

One fascinating thing about this book, and I imagine every Clojure book, is how little time is spent explaining syntax. Clojure is a Lisp-style language, so syntax is kept to a minimum. What do I mean by that? Well, the basic syntax of Clojure is a function call, followed by its arguments, both wrapped in parentheses like so:

(println "Hello, World!")

Vectors are denoted with [] and maps follow the form of {:key1 value1 :key2 value2}. Nearly all of the code looks like this, just with more complicated nesting of functions. After learning the standard library functions, you know and understand about 90% of the language! The more advanced language features like promises and macros add some more syntactical sugar, but really, compared to C-style languages, Clojure's syntax is incredibly lightweight. Some programmers may hate all of the parentheses, and the prefix arithmetic notation takes some getting used to, but learning a language that's so consistent in its structure is enlightening.

Not only does Clojure have the elegance of a Lisp, but it also runs on the JVM so we have access to all of the Java libraries that have been built up over the last few decades. That may not always seem like a benefit, considering how convoluted some Java libraries are, but Clojure has its own great features that should take precedence over the uglier parts of Java while still being able to leverage all of the time-saving work that's been done already.

Plus, Clojure has made significant advances in modern concurrent programming, both through its inherent nature as a functional language with immutable data structures, and because of safe concurrent programming structures like promises and futures. As Olsen says about threads, "One of the things that makes programming such a challenge is that many of our sharpest tools are also our most dangerous weapons." If concurrency is anything, it's hard, but Clojure makes this increasingly important programming paradigm easier and safer, as long as you know how to use those sharp tools.

Olsen has done a great job of teaching the set of tools available in Clojure with this book, and beyond it being clear and well written, it was a fun read all the way through. I love learning new languages and the new programming tools that they reveal, especially when I can find a great field guide like this one to help me along the way. If you don't know Clojure and would like to learn, Getting Clojure is a highly recommended read.

Learn Functional Programming with Elixir

Like Clojure, I wanted to dig more deeply into Elixir after reading about it in Seven More Languages in Seven Weeks. This book showed some promise as a quick introduction to the language that would focus on the functional programming paradigm. I think the title is a bit of a misnomer, though, because it was more on the side of a quick introduction to Elixir, which just happens to be a functional language. Almeida did not go into too much detail about how to use the functional paradigm to greatest advantage, and instead stuck to the basics.

Spending time on the basics is fine, of course. It just wasn't what I was expecting. The book is split into seven chapters that cover a quick introduction of what Elixir looks like, variables and functions, pattern matching and control flow, recursion, higher-order functions (like each, map, and filter), an extended example text game, and impure functions. Notably missing from this list is anything having to do with concurrency and parallelism—Elixir's primary claim to fame, being that it runs on the Erlang VM. But this is a beginner's book, after all, and it keeps things pretty simple, although the pace is probably too fast and the explanations too short for someone who has never programmed before. This book is definitely meant for experienced programmers looking to get started with Elixir quickly.

In that respect, the book accomplishes its goal quite well. It presents all of the basic features of Elixir in a logical and succinct manner, covering all of the different syntax elements of the language without much ceremony. Elixir has its fair share of syntax, too, much more so than Clojure does. Whereas Clojure consists entirely of function calls, Elixir syntax is much more exotic:

max = fn
x1, x2 when x1 >= x2 -> x1
_, x2 -> x2
end
This is a simple function that returns the maximum of two numbers, but it shows some of the more extensive syntax of Elixir with pattern matching on the second and third lines, the when guard clause, the underscore used as a wildcard matcher, and the anonymous function declaration. When this function is called, if line 2 matches, including the guard clause such that x1 >= x2, then x1 is returned. Otherwise, line 3 will match automatically and x2 is returned. This is just a sampling of syntax, too. Things get even more involved with lists and maps and function arguments, all mixed in with pattern matching and pipes. This is a rich language, indeed.

The brief explanations of all of these language features tended to be a bit wanting. They were so clipped and simple that I was often left wondering if there wasn't much more to some of the features that I was missing. The writing style was abrupt and disjointed to the point of being robotic. Here is one example when discussing recursion:
Code must be expressive to be easier to maintain. Recursion with anonymous functions isn't straightforward, but it is possible. In Elixir, we can use the capturing feature to use named function references like anonymous functions:
Here's another example when describing the Enum module:
The Enum functions work like our homemade functions. The Enum module has many useful functions; it's easy to guess what they do from their names. Let's take a quick look:
This kind of writing just starts to grate on me because it has no natural flow to it. I would end up skimming over much of the explanations to try to pick out the relevant bits without feeling like I might be assimilated by the Borg.

Most of the code examples were forgettable as well. They did an adequate job of showing off the language features that they were meant to showcase, but they certainly didn't serve to inspire in any way. On the other hand, chapter 6 on the extended example of a text game was quite delightful. This chapter made up for most of those other faults, and made the book almost worthwhile.

In the example game, you code up a simple text-based dungeon crawler where you can pick a hero and move through a dungeon fighting monsters. It's an incredibly stripped down game, since it's developed in only about 35 pages, but it shows Elixir in a real application setting, using all of the language features that were introduced in the rest of the book. It was fun and illuminating, and I wish the rest of the book could have been done in the same way, explaining all of the Elixir syntax through one long code example.

Alas, it was not done that way, but even though the rest of the book was terse and didn't cover some of Elixir's more advanced features, it was still a decent read. It was short and to the point, making it useful for a programmer new to Elixir that needs to get going with the language right now. For anyone looking to learn Elixir more thoroughly, and maybe more enjoyably, you'll want to look somewhere else.


Of the two books, clearly Getting Clojure wins out over Learn Functional Programming With Elixir. Olsen showed once again how to write a programming book well, while the Elixir book was mechanical and insufficient. That's great if you're in the mood to learn Clojure, but what about Elixir? It's a fascinating language, but I'll have to look further to find a good book for learning the details.

2020. április 8., szerda

Apologies

Apologies for not posting very regularly over the holidays due to a lot of IRL issues. I should get back into the swing of things hopefully soon. Thanks for understanding!

The How of Happiness Review

2020. április 3., péntek

fw: help me remove bad articles from google

Remove those annoying ripoff reports or even trustpilot reviews, scam
advisor reviews
clean up your reputation
http://monkeydigital.tk/product/reputation-management/

regards
Lashunda Lucarelli


http://monkeydigital.tk/unsubscribe/